To create a form in Confluence Cloud with Forms in Cloud for Confluence, edit a page, insert the app's field macros, add a Submit Button, and publish. People can then complete the form on the page, and you can review their submissions through the app.
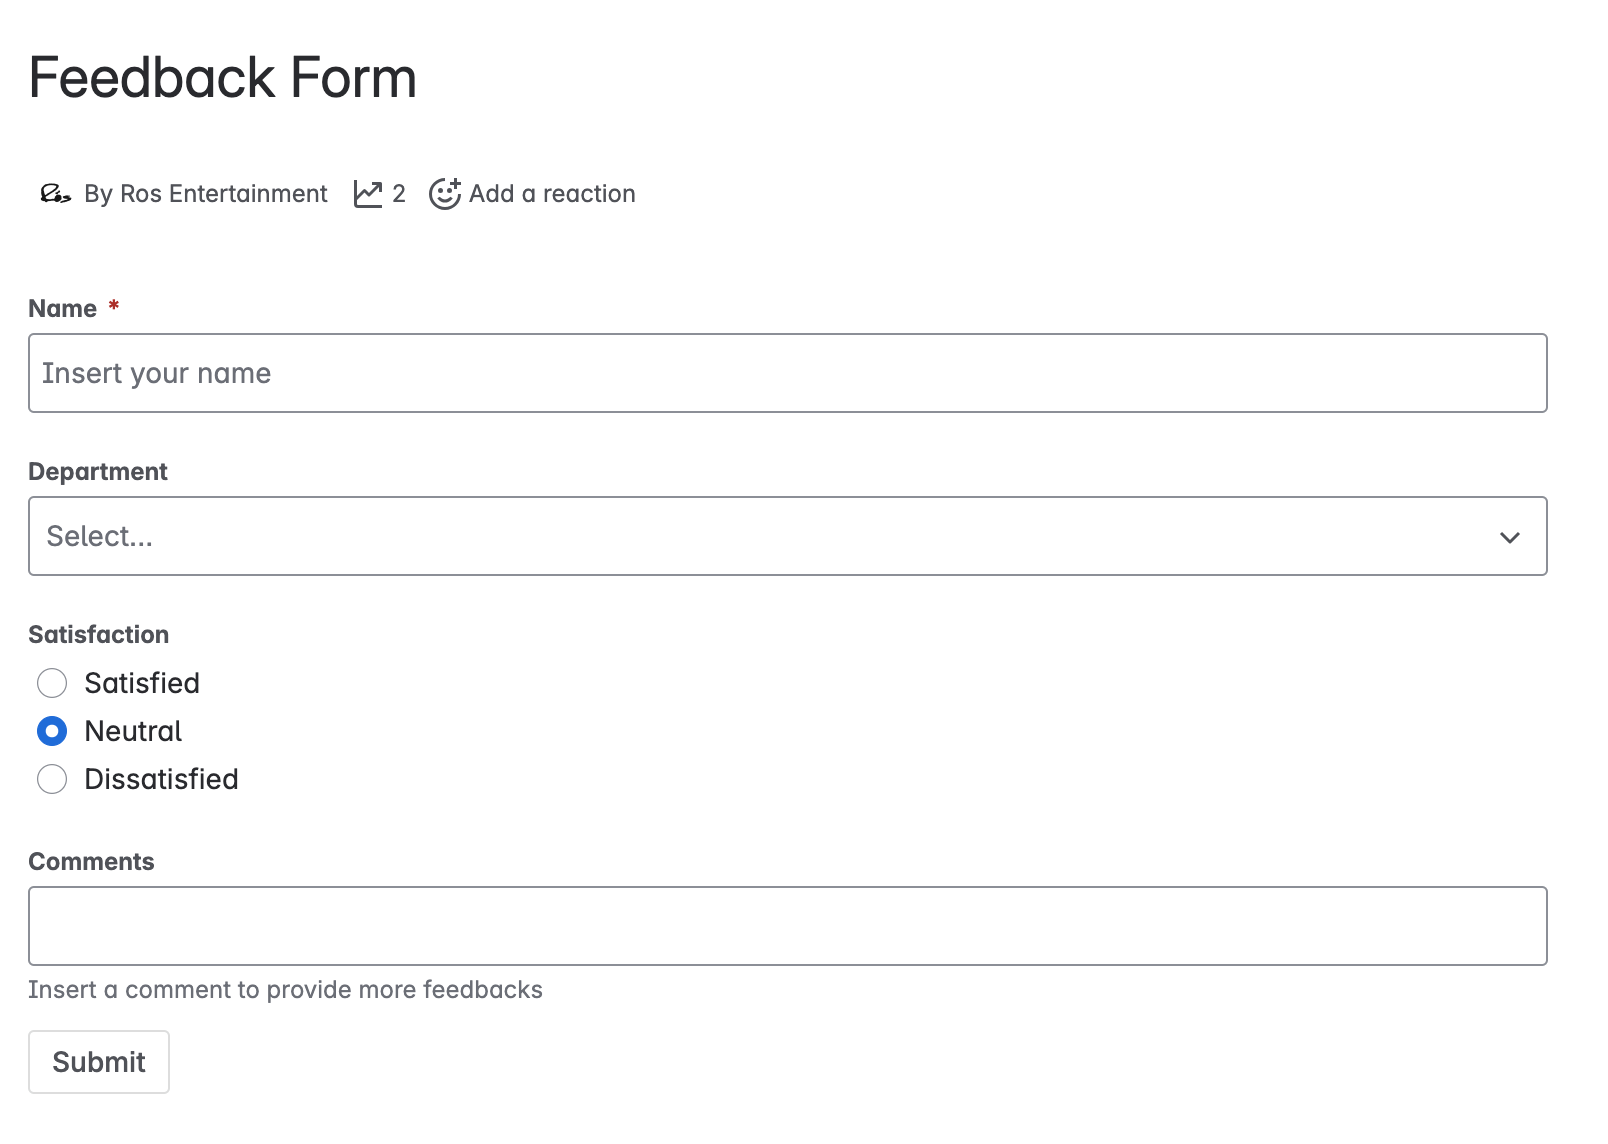
This guide walks through a feedback form with a name, department, satisfaction question, and comments. It uses Forms in Cloud, the app we develop at Ros Entertainment. The macro names and screenshots below refer to that app.
Before you start
- A Confluence Cloud site. This walkthrough is for Cloud; menus and apps can differ on Data Center.
- Forms in Cloud installed on your site. If it is missing, ask an administrator to review and install it from the Atlassian Marketplace.
- Permission to create or edit a page in the space where you want the form.
- An intended audience and a response owner. Decide who should fill it in and who will review the answers.
The fields in this tutorial are supplied by the app. If searching the editor does not show them, check the installation with your administrator first.
1. Create a page for your feedback form
Create a Confluence page in the relevant team space, or edit an existing one. For this example, use the title Feedback Form.
Above the fields, add a short introduction explaining the purpose. For example: “Tell us how this week's onboarding session went. The onboarding team will review your feedback before the next session.” This gives people a reason to respond and makes ownership clear.
In the page editor, type /Forms in Cloud to find the available field macros. Insert each field where you want it to appear. This is the workflow described in the app's getting-started documentation.
2. Add the fields your form needs
Start with four questions. The choice fields make it easier to compare answers, while a comments field lets people explain their experience.
| Question | Macro | Example answer |
|---|---|---|
| Name | Text field | Alex |
| Department | Dropdown | Support |
| Satisfaction | Radio | Satisfied |
| Comments | Text field | A checklist would help me get started. |
Configure the name field
Insert a Text field macro. Set Name to Name and Label to Name. These settings have different jobs: Name identifies the field in the saved data, while Label is the question people see.
Set Placeholder to Enter your name and enable Required for this example. Give each field a unique Name. The Text field reference explains these settings.
Add department and satisfaction choices
Insert a Dropdown macro with the Name Department. In Options, enter each choice on a separate line: Product, Support, Engineering, and Other. Replace these suggestions with the departments your team actually uses.
Next, insert a Radio macro with the Name Satisfaction. Add Satisfied, Neutral, and Dissatisfied as separate lines in Options. Dropdown and Radio each let the respondent select one answer. See the Dropdown and Radio references for their parameters.
Leave room for a comment
Add another Text field, using Comments for both Name and Label. Leave Required off and use Description to ask a focused question, such as “What could we improve for the next session?” Confirm each macro's settings before moving to the next field.
3. Add a Submit Button
After the last question, type /Forms in Cloud again and insert the Submit Button macro. Set its Label to Submit and leave Disabled off so people can send their answers.
This macro is required to submit the form. Adding input fields alone does not complete the setup. The Submit Button reference describes both options.
4. Publish and test the form
Publish the new page, or publish your changes to an existing page. Test the form from the published page where respondents will use it.
- Try submitting with Name empty to check the required-field behavior.
- Enter a test name, select a department and satisfaction answer, and add a recognizable comment such as
Test submission. - Select Submit, then open the responses as described in step 6 and confirm the values were recorded.
Test again with a colleague who has the access your respondents will have. This checks both the form itself and whether your audience can reach it.
5. Share the page with your team
Share the published page link with the intended respondents. Before sending it widely, check the page and space restrictions with the space owner.
A required Name field makes this example identifiable, so do not describe it as an anonymous survey. If you need anonymous or external responses, confirm the app's behavior and your site's access settings for that use case first. A page link alone does not establish who can open or use the form.
6. Find and review the responses
Open Forms in Cloud from Confluence's Apps section or global sidebar. Find Feedback Form in the list, open its Actions menu, and select Responses.
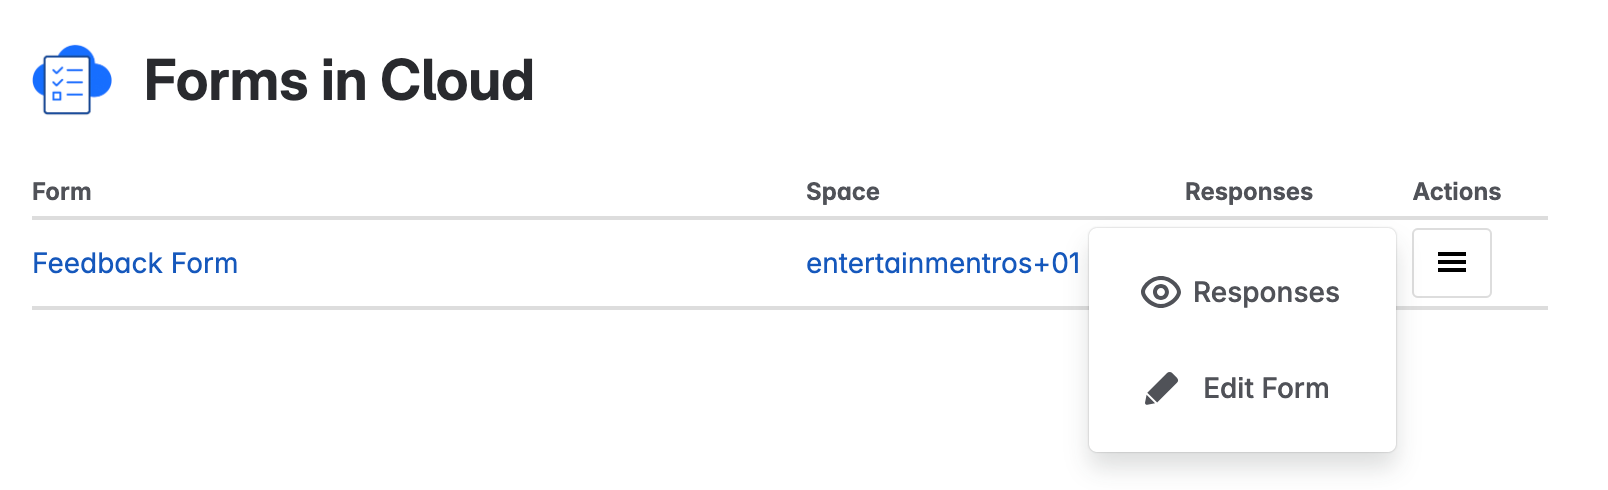
The response viewer shows submissions in a table, including field values and submission timestamps. Check your test entry before asking the rest of the team to respond.
Access depends on Confluence permissions. If a colleague cannot find a form or its responses, check page and space restrictions. The response-management documentation explains access and the response viewer.
Give the response owner a regular review time. For an onboarding form, that could mean checking answers after each session and choosing one improvement for the next group.
Common questions about Confluence forms
Why can't I find the Forms in Cloud macros?
Make sure you are editing a page on a Confluence Cloud site where the app is installed. Search for /Forms in Cloud. If the macros are still missing, ask your administrator to check that the app is available on that site.
Why can't I submit a response?
Check that the page changes are published, that you included the app's Submit Button macro, and that its Disabled option is off. Complete any required fields, then retry. If it still fails, note the error message and contact app support.
Is this the same as Easy Forms for Confluence?
No. This tutorial uses Forms in Cloud for Confluence by Ros Entertainment. Easy Forms for Confluence is a separate Appfire product. Check which app your site uses before following macro-specific instructions.
Should I use Confluence forms or Google Forms?
Start with who needs to respond, where they work, and who should access the answers. For a closer look at those choices, read our Confluence Forms vs Google Forms comparison.
Create your first feedback form
Start with the four-field example, verify a submission, and share it with a small group. Once that works, adapt the questions to the feedback or requests your team needs to collect.
Explore Forms in Cloud for Confluence for the app overview and installation link.